Thursday, December 13, 2012

SHAWLS

My apologies for not posting for quite some time.  One gets busy. 

There are a couple of new things that I have been working on: lace shawls and beading.  Those are two skills that I have not had much experience in, so I thought I would do some projects to remedy that. 
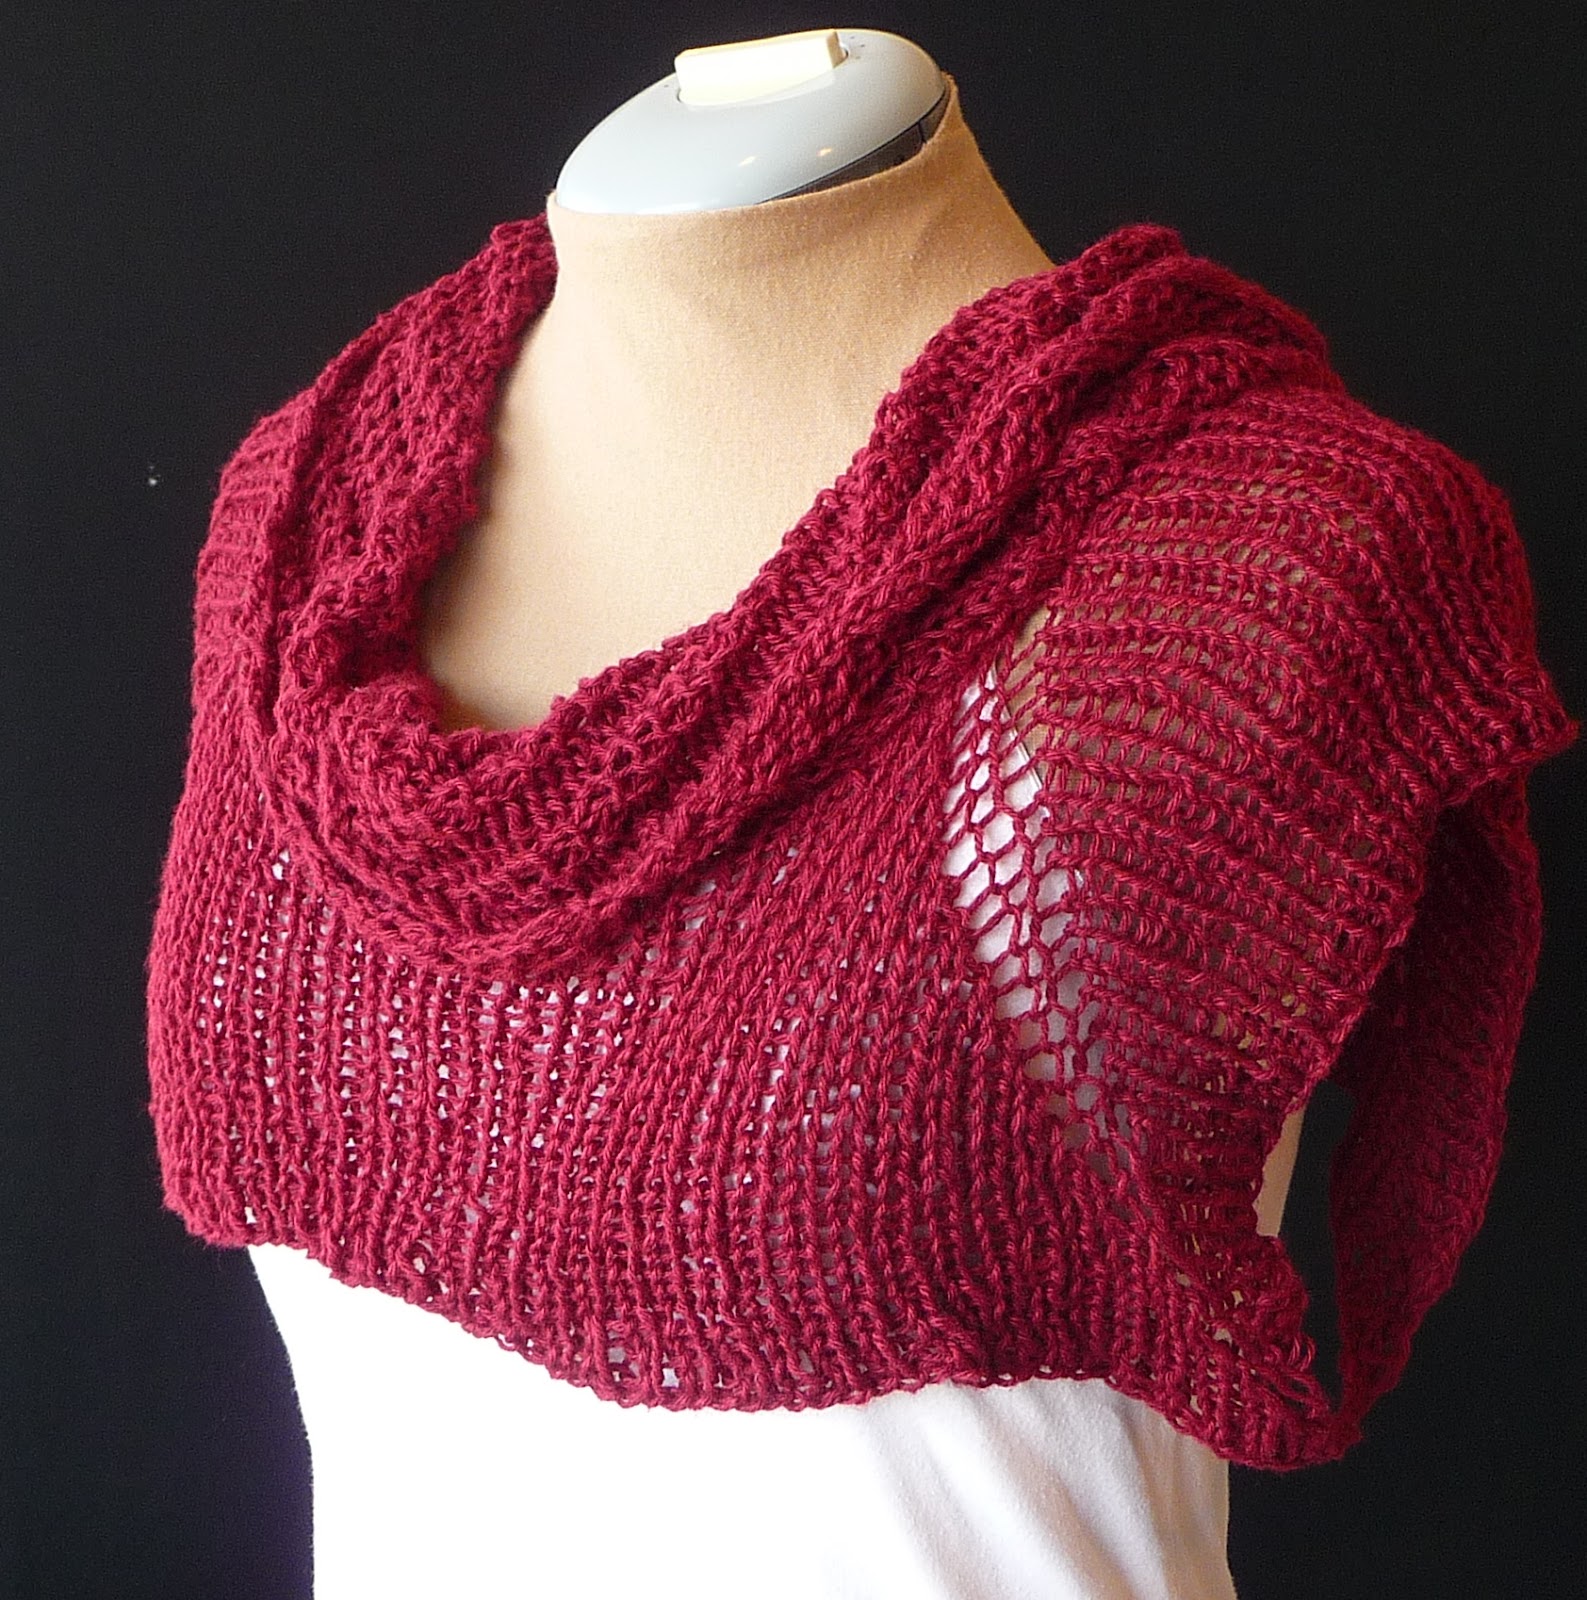
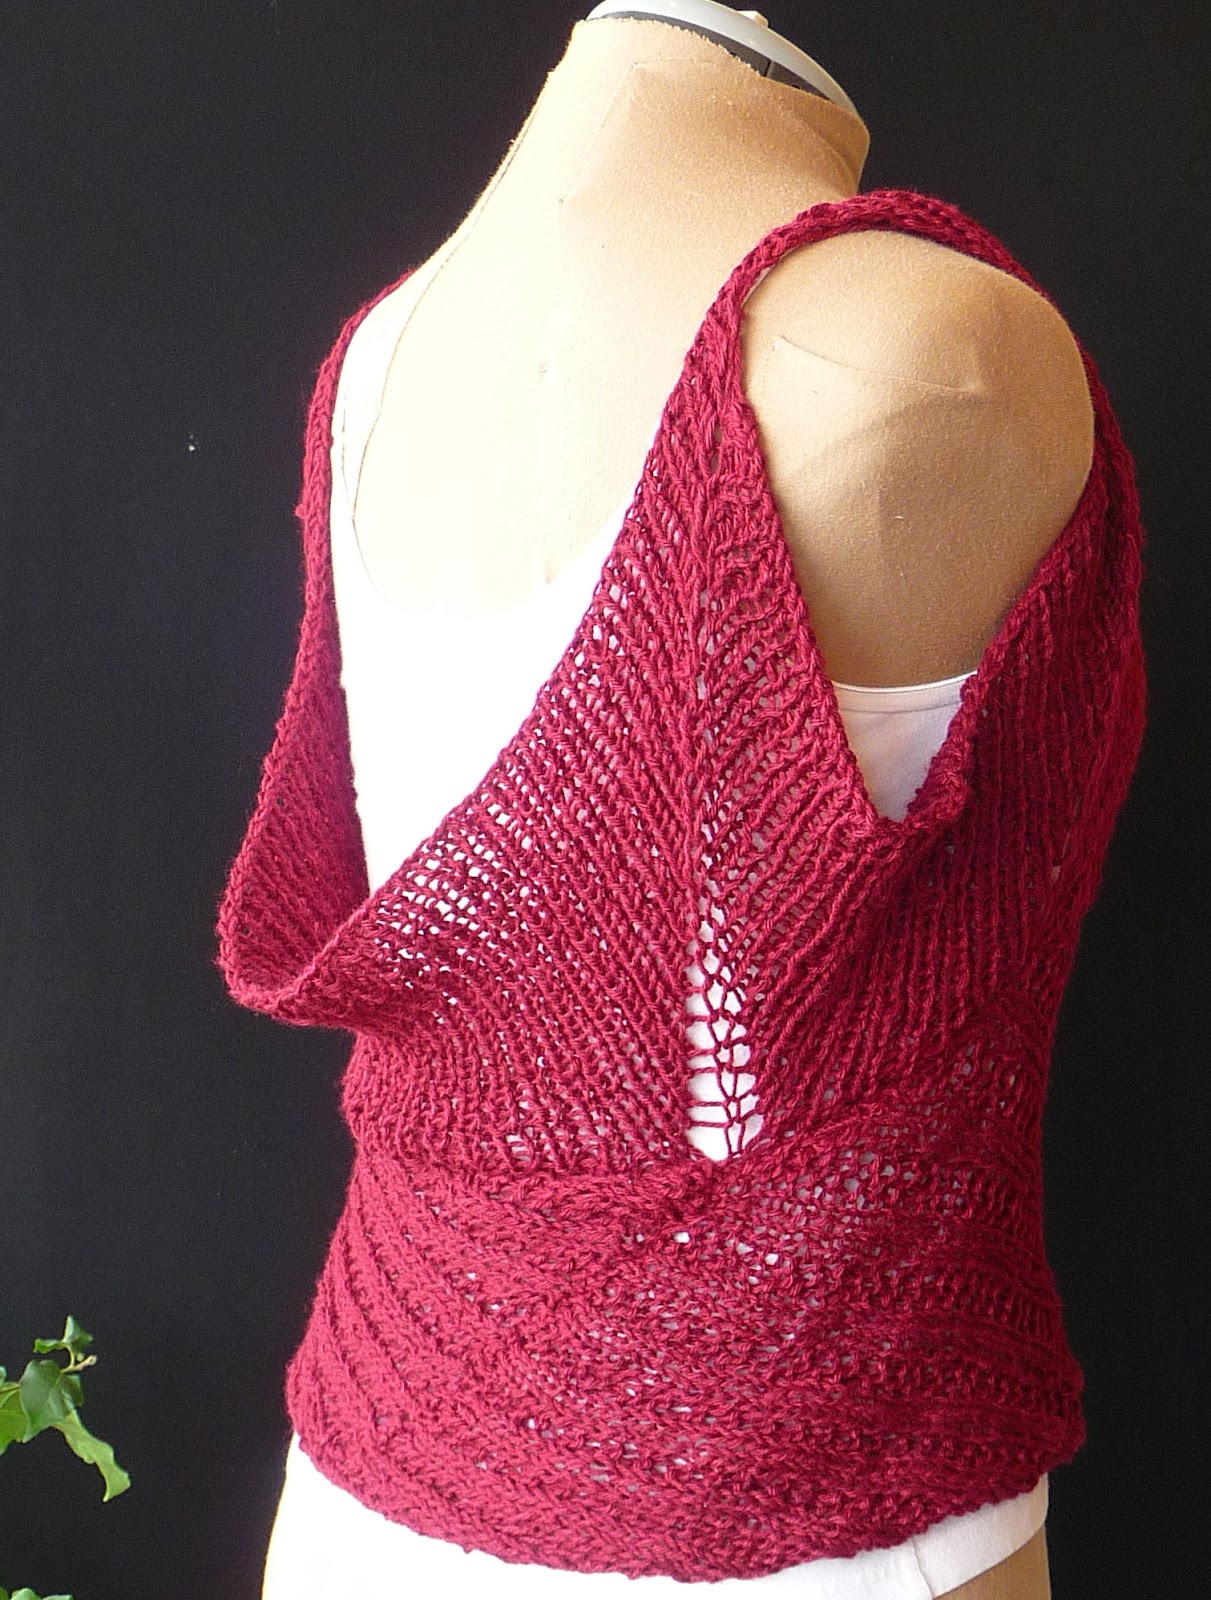
 TRAVELING VINES WRAP

Traveling Vines Wrap
 The first project I did was the Traveling Vines Wrap, made from 100% raw silk from Tess Yarns. http://www.tessyarns.com/  The company has some really gorgeous yarns.  I picked this up at the Stitches West conference.  I chose the traveling vines lace pattern and basically just made a large rectangle.  The yarn is so soft and yummy, it feels great next to your skin.
Traveling Vines Wrap detail

The pattern is very
easy to learn, after a few repeats, and  I  think it works nicely for a rectangular shape, as opposed to a triangle. 

I love how the pattern flows like waves, or as the name suggests, like growing vines.  You can see this shawl on my Etsy site: http://www.etsy.com/shop/MyHandmadeCollection


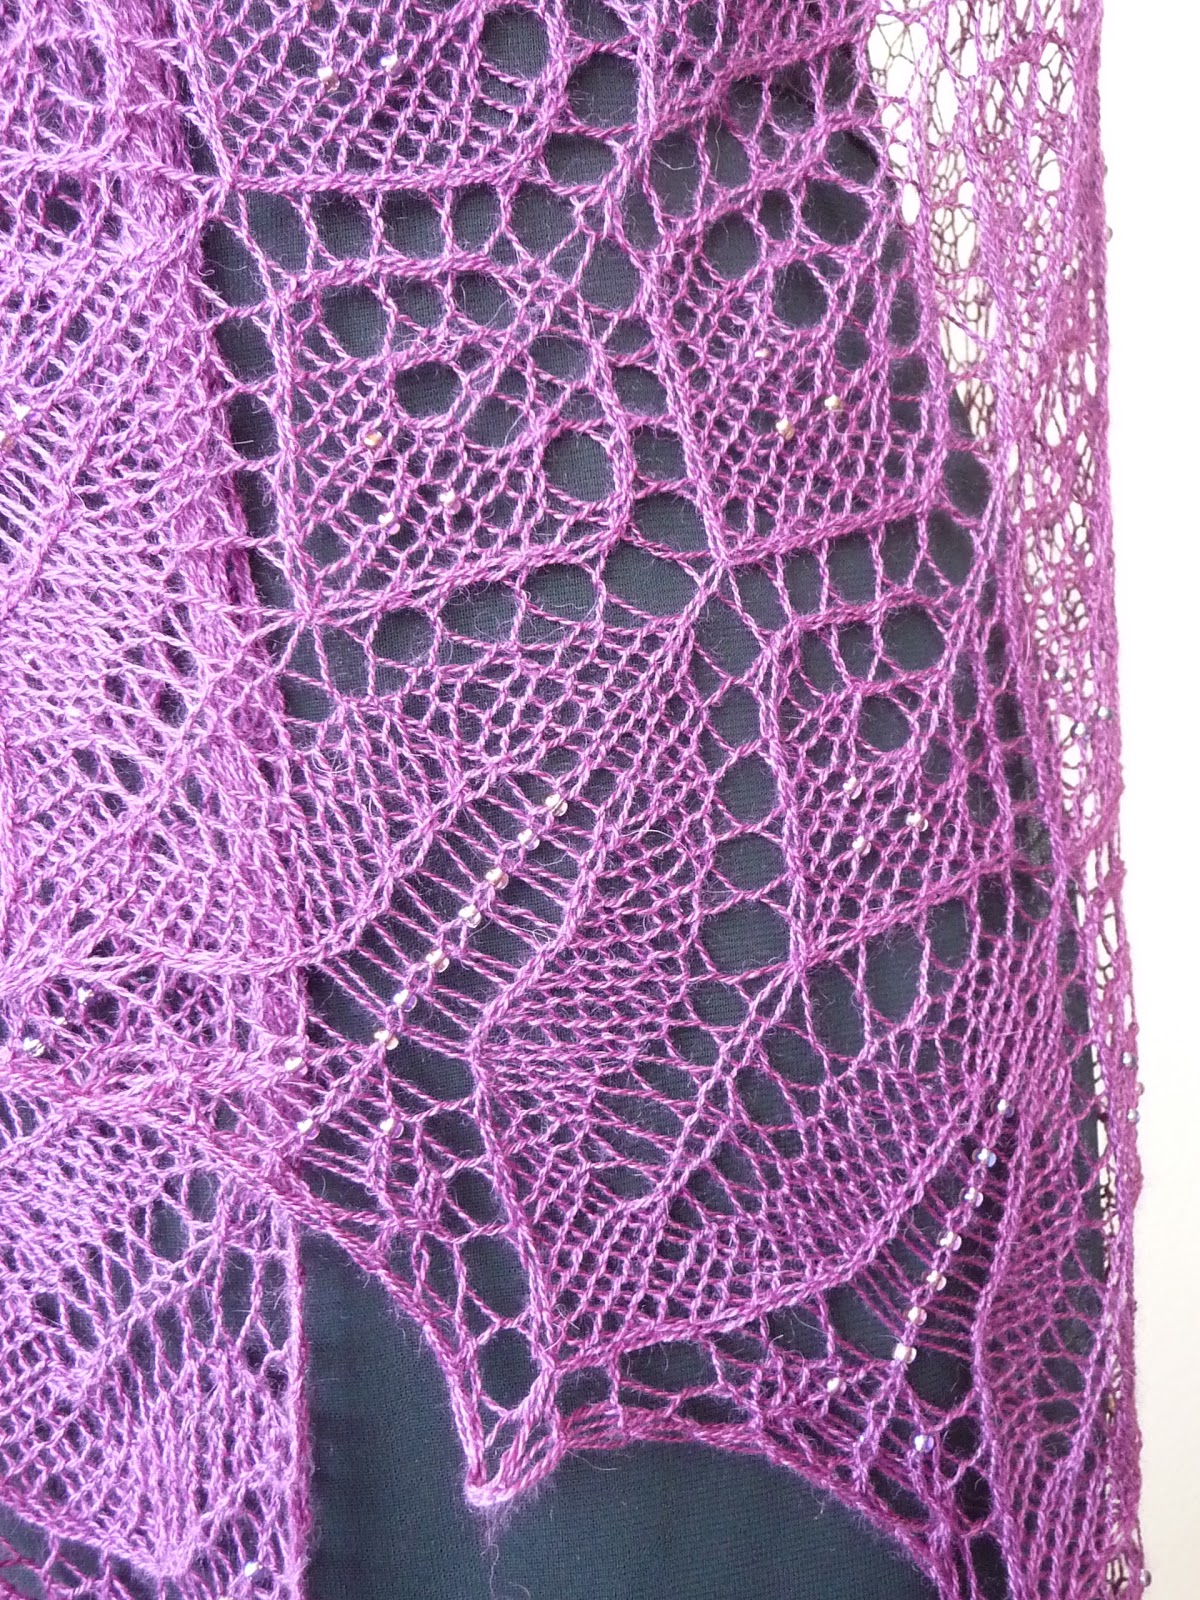
BELLA BOTANICAL SHAWL


detail with beads
Elegant Beaded Shawl

The second project I worked on was a triangle shawl, the Bella Botanical shawl, by Karen Straus.  The yarn I chose for this project was also purchased at the Stitches West conference, at the Garn Studio/Drops booth.  This yarn is a lovely  lace weight in  baby alpaca and mulberry silk.  You can find it at http://nordicmart.com/.

This pattern took a bit more concentration, though by the end, I had it fairly memorized.  It is worked from the top edge and has a graduated sizing of leave motifs as you go, ending with a nice leaf edge.  

Adding beads was also a new experience for me.  I have read of several different methods of adding beads; the first one is to string all the beads onto the yarn before you begin your project. That seems like an incredible amount of work, so I opted for the
Detail
Elegant Beaded Shawl
second method.  That requires the purchase of a tiny crochet hook (size 0.9 mm) if you don't already have one.  The method is very simple:  As you reach the stitch in which you require the bead, you place a bead on the crochet hook in your right hand, then pull the stitch from the left hand needle onto the crochet hook, through the bead, and then place the stitch back on the left hand needle.  Continue knitting as you were.  You can also see this shawl at http://www.etsy.com/shop/MyHandmadeCollection.


Saturday, April 7, 2012

Dazzle Shawl

This lovely, comfortable shawl is made from yarn that I purchased at the Stitches West Convention.  It comes from Newtons Yarn Company  http://www.newtons.com/yarns.htm  and is a blend of rayon, superwash wool, and metallic yarn.  It's super soft, which is unusual for a yarn with a metallic component.  It also drapes very nicely, so it's just a joy to wear!
Detail view

The pattern is a simple mesh pattern, leaving the shawl open and lacy, so it works well even in warmer weather.   It's long enough to wrap around your shoulders, so it will keep you warm from the chilly evening air.

It's hard to see the sparkle in the yarn in these photos, but there is a nice thread of sparkly purple running through the fabric, so it looks almost as if there are beads imbedded in the yarn.  It makes the shawl perfect for some special event, but it's sooooo comfortable, you'll never want to take it off!  Check it out at my Etsy store
http://www.etsy.com/listing/97001869/dazzle-lace-shawl.


Sunday, March 25, 2012

Free Pattern! Fall Woods Scarf

This delicate scarf is light and classy, and can be dressed up or down.  The little row of sewn on beads adds a bit of flair and sparkle to the lovely flow of the scarf.  Enjoy knitting and wearing!

Materials:  Sublime Mohair, 2 skeins
Size 8 needles
Asst. seed beads (optional)

Seed St. Border Pattern:
Row 1:  At beg of row,  P1 K1 twice, K2 .  Last 6 sts:  K2, K1P1 twice
Row 2:  At beg of row, P1K1 Twice, P2.  Last 6 sts:  P2, K1P1 twice.

Waterfall Pattern:
1st row: P3, *K3, yo, P3; rep from * to end
2nd row:  K3, *P4, K3; rep from * to end
3rd row:  P3, *K1, K2 tog, yo, K1, P3; rep from * to end
4th row:  K3, * P2, P2tog, K3; rep from * to end
5th row:  P3, *K1, yo, K2tog, P3; rep from * to end
6th row:  K3, *P3, K3; rep from * to end
Rep these 6 rows

Leaf Pattern:
1st row:  K2, Sl 1, K2tog, psso, K7, yo, K1, yo, P2, yo, K1, yo, K7, K3tog, K2
2nd row and every alternate row:  P13, K2, P13
3rd row:  K2, Sl 1, K2tog, psso, K6, [yo, K1] twice, P2, [K1, yo] twice, K6, K3tog, K2
5th row:  K2, Sl 1, K2tog,, psso, K5, yo, K1,  yo, K2 , P2, K2, yo, K1,  yo, K5, K3tog, K2
7th row:  K2,  Sl 1, K2tog, psso, K4, yo, K1, yo, K3,  P2,  K3, yo,  K1,  yo,  K1, yo, K4,  K3tog, K2
9th row:   K2, Sl 1, K2tog, psso, K3, yo, K1, yo, K4,  P2,  K4, yo,  K1,  yo,  K1, yo, K3,  K3tog, K2
10th row:  As 2nd row.   Rep these 10 rows.

CO 39 St.  Work  border pattern in first and last 6 sts throughout.
In center 27 sts, work Waterfall pattern 4 times across.
Repeat Waterfall Pattern 3X, keeping Seed St Border Pattern throughout .  NEXT 2 ROWS: K
NEXT ROW: *K1YO*, repeat from * across, K1.
next row: K
next row: K1 *K2TOG. Repeat from *.  39 sts.
next  row: K
With R side facing, and keeping border pattern in 1st & last 6 sts, begin Leaf Pattern. Repeat 23 times, or to the length you desire. 
NEXT 2 ROWS:  K
NEXT ROW:  *K1YO*, repeat from * across, K1
next row: K
next row: K1 *K2TOG. Repeat from *.  39 sts.
next  row: K
REPEAT WATERFALL PATTERN AS IN BEG.
BO all sts.

FINISHING:  Weave in any ends, Block
(Optional) sew asst beads along section that separates Waterfall and Leaf Patterns.

Copyright 2011, by Rusty Baker, My Handmade Collection.  This pattern is intended for personal use and cannot be duplicated in any form without express consent of designer.

Saturday, March 24, 2012

Two Way Shrug/Tank Top Pattern

Cowl collared shrug
I love shrugs.  I love them because they are easy and quick to make, and they keep my shoulders warm when I get a bit chilly. (Like in an air-conditioned room!)  They can really enhance that little black dress, or a tank top with jeans, you name it. 

This little shrug is something I designed just for that purpose, and it has the added bonus of being able to convert to a tank top too.  The tank top, I think,  is very flattering, with a fitted silhouette, and  a low flared neckline.   And the cowl collar on the shrug add a nice fashion forward element.
Front view
Back view


The shrug/tank is made from the top down, all in one piece, with the cowl collar made separately and sewed on.  Other than that, there is very little finishing.  Just weaving in the ends. 


Cowl detail


The cowl collar has a nice ribbing detail as well, to add a bit more interest to the finished garment.  To wear it as a shrug, slip it on with the cowl at the top, to wear it as a tank, place the cowl at the waist.

This pattern is available for $4.50 at http://www.etsy.com/listing/96041951/two-way-shrug-tank-top-knitting-pattern

Saturday, March 10, 2012

Spring Fever Hats

I know, scary looking model, right?  Sorry!  But the hat is cute!


 It's been an exceptionally warm winter, and spring has definitely made an appearance (once or twice) around here.  Today is supposed to be 68 degrees!  Anyway,  I've been trying to develop a pattern for baby cocoons on my knitting machine, but so far, I've made them too small.  So they have become springtime hats!  Nice light weight little beanies that you can wear when its cool, but not too cold.


Rolled Edge Beanie
Both these little caps are made with sock yarn, (washable wool. bamboo, and polyamide), combination of Sensations Bamboo & Ewe, http://www.joann.com/jo-ann-sensations-bamboo-ewe-yarn/xprd991995/  and  Drops Fabel. http://www.nordicmart.com/shopdisplayproducts.asp?id=58&cat=DROPS+Fabel

The red one is knit in the round on my Brother machine, using the ribber attachment.  (Still learning how to use it!)  The purple one was made flat and then sewed along the edge.  They are both really comfortable and fun to wear.  They are the type of hat you can wear all the time!

Rolled Edge Flower


I added a different top to each hat, based on the basic design of the hat.  The purple one just has a rolled edge, in keeping with the hem of the hat, that is gathered and sewed in place.  It has a bit of a flower look to it.

I-cord topper

The red one started as a rectangular sack, so I folded the two square edges into the center and sewed them together, then made an I-cord that I looped around and attached to the center.  I think both are pretty cute.

Both hats are available at my Etsy store. 
Available at my Etsy shop!
Available at my Etsy shop!

Tuesday, February 28, 2012

Stitches West

 This last weekend I attended the Stitches West Convention in Santa Clara, Ca.  It was a giant event, with what seemed like about a thousand vendor booths, tons of demos, classes and best of all, like-minded folks all in one place. 

There was a ton of information, and some very interesting classes.  Unfortunately, I signed up late so most of the classes were sold out by the time got around to it.  I actually wouldn't have known about it but for a post in my knitting forum, Knitting Paradise.  At any rate, I was glad that I went.

Another fabulous thing about the show was how much YARN there was there to purchase!  Of course, I could not resist, and bought some very nice yarns, the nicest of which came from Tess's Yarn, out of Portland, Maine.  (/http://www.tessyarns.com/).  It's a little expensive, but oh, so nice!

On Sunday, I took a class from Melissa Leapman, called Fully Fashioned and Fabulous, and I learned some new ways to add detail and shape to knitted garments.  Definitely up my isle, since I like sweaters that have nice design details.
 All in all, it was fun and educational, but in the future, I'd better get my act together sooner, so I can take the classes in which I will learn the most, and that will support my development in knitwear design. 

My next show (that I know of) will be here in my own town, Reno!  That's The Knitters Guild Association's fall show.  www.TKGA.com
Hopefully, I will be doing some volunteer work there.  Looking forward to it!

Happy knitting!

Saturday, February 18, 2012

Swatch Washcloths


I've been playing around with my knitting machine lately, trying to learn new stitches and familiarize myself with the attachments, etc.  I made a few swatches out of cotton that I thought would be suitable for baby washcloths for the grand children.  I found some leftover cotton that I had so I got started looking for some simple patterns that I could practice on.  
The results:  Three colors, three patterns, all different sizes.  Kind of a mish mosh trio of baby washcloths, but they look nice all rolled up and tied with a bit of lace.  As I find more bits of cotton yarn, I'll make more little swatch washcloths.